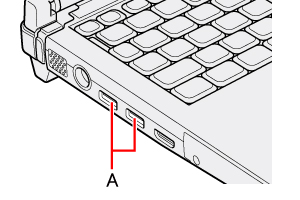
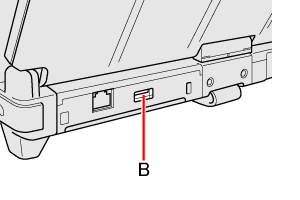
USB Devices |
Connecting/Removing USB DevicesTo connect the USB device
To remove the USB device
CAUTION
<Only for model with Smart Card slot>
- If you double-click
 , [USB Smart Card Reader] is displayed in the list, but do not select this item. Removing this item is not possible. Restart the computer in case you select this. , [USB Smart Card Reader] is displayed in the list, but do not select this item. Removing this item is not possible. Restart the computer in case you select this.NOTE
- You may need to install the driver for the USB device. Follow the on-screen instructions or refer to the instruction manual of the USB device.
- You may need to install the driver again when connecting the device to another port.
- When a USB device is connected, sleep and hibernation may not function normally. If the computer does not start up normally, remove the USB device and restart the computer.
- When the USB device is removed and then inserted while the computer is on,
- When a USB device is connected, power consumption increases. Remove the USB device when it is not in use, especially when operating by battery power.
- If the computer enters sleep or hibernation while a USB keyboard or mouse is connected, touching the USB keyboard keys or mouse will resume the computer.
|